If your air conditioning system struggles to cool your space properly, it might be time to check the evaporator coil.
The evaporator coil plays a crucial role in the cooling process—if it’s malfunctioning, the whole system can underperform. Replacing the evaporator coil might sound daunting, but understanding its importance can make the process much easier and help you make the right decision.
So, why is the evaporator coil so vital?
Simply put, it absorbs the heat from the air inside your home, allowing the refrigerant to remove that heat and expelling it outdoors. When it stops working, you’ll notice signs like poor cooling, strange noises, or even ice buildup. Instead of dealing with ongoing issues, a coil replacement might be your best option.
At Excel Mechanical, we make AC maintenance and repairs seamless. With our years of experience and expertise in HVAC services, we help homeowners and businesses keep their cooling systems running efficiently, ensuring comfort all year round.
In this blog, we will discuss:
- The role of the evaporator coil and why it’s essential for your AC system.
- Signs your evaporator coil might need replacement.
- A step-by-step guide to replacing the evaporator coil, along with safety tips.
Let’s dive in!
Understanding the Role of the AC Evaporator Coil
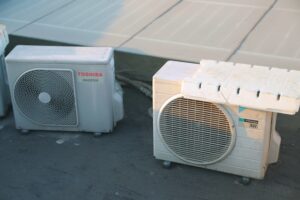
The AC evaporator coil is a key part of your air conditioning system. It plays a crucial role in cooling your home. Located inside or near the air handler, it works to absorb heat from indoor air.
- The coil contains refrigerant, which evaporates as it absorbs heat.
- This process cools the air.
- The heat-laden refrigerant then moves to the condenser coil outside, releasing the heat into the outdoor air and allowing the cycle to continue.
Problems with the evaporator coil can result in inefficient cooling. Signs of issues include reduced airflow, ice buildup on the coil, and an AC unit running longer than usual. If you notice these problems, it may be time to consider replacing the coil.
Signs of a Faulty AC Evaporator Coil
Your AC system may show several signs if the evaporator coil is faulty.
- One common indicator is warm air blowing through the vents, even when the system is set to cool. This happens because the coil can’t remove heat from the air as it should.
- Unusual noises from the unit may also point to a problem. These might include hissing, which can suggest a refrigerant leak. Such leaks often occur in or around the coil, affecting the system’s ability to function efficiently.
- Be on the lookout for frozen coils, too. If you see ice on the coils during warm weather, this means the coil isn’t absorbing heat properly. This can reduce cooling and even lead to system shutdowns.
- Higher energy bills can also be a clue. If your AC isn’t cooling effectively, it may work harder and longer to reach the desired temperature, using more energy.
- Musty or moldy odors can also develop. When the coil doesn’t drain condensation properly, mold can grow. These smells are not only unpleasant but can also affect indoor air quality.
If you notice any of these signs, consider contacting Excel Mechanical. Our team of experts provides high-quality HVAC and plumbing services. We aim to offer the best system to meet your unique needs and budget, ensuring exceptional quality and value for both residential and commercial customers.
Tools and Materials Needed for Replacement
Replacing an AC evaporator coil requires specific tools and materials to ensure the job is done right. Here is a simple list to guide you.
Essential Tools:
- Screwdrivers: Both flathead and Phillips types.
- Wrenches: Adjustable for different bolt sizes.
- Pliers: Needle-nose and standard are useful.
These tools help loosen and tighten connections safely.
Materials Required:
- New Evaporator Coil: Ensure the coil is compatible with your AC unit.
- Refrigerant: R-22 or R-410A, depending on your system’s needs.
- Insulation Tape: For wrapping joints and preventing leaks.
Safety Equipment:
- Gloves: Protect your hands from sharp edges.
- Safety Goggles: Essential for eye protection.
- Face Mask: To avoid inhalation of dust and chemicals.
Additional Items:
- Shop Vacuum: Great for cleaning debris from the system.
- Leak Detection Kit: Ensures connections are sealed properly.
Preparation for AC Evaporator Coil Replacement
Before starting the replacement, gather all the necessary tools and materials.
Safety goggles, gloves, and a multimeter are essential. You will also need a set of screwdrivers, a wrench, and a vacuum pump.
- Turn off the power to your AC unit.
- Safety first! Locate the circuit breaker and flip the switch.
- Double-check that the power is off to avoid any electrical hazards.
- Next, release the refrigerant. This step requires caution. If you’re not certified, consult a professional. Proper handling of refrigerants prevents environmental harm.
- Clear the workspace around the AC unit. Make sure there’s enough room to work comfortably on the unit. Remove any clutter or obstacles that might get in the way.
- Take photos of your current setup. Documenting the configuration of wires and parts will help when reassembling the unit. It’s also handy if you get stuck during the installation.
- When you’re ready, disconnect the wiring carefully. This step is precise, so label the wires to remember their correct placement.
Safety Precautions
When replacing an AC evaporator coil, safety should be your top priority. Always turn off the unit’s power before you begin. This prevents electrical shock or accidental activation of the system.
- Protective Gear: Wear safety goggles and gloves to protect your eyes and hands from sharp edges and refrigerant exposure. It’s essential to prevent injuries and irritation while handling equipment.
- Proper Ventilation: Ensure the area is well-ventilated. This is crucial to avoid inhaling fumes or refrigerant gases that may escape during replacement.
- Tools and Equipment: Use the correct tools for the job. A misplaced tool can cause damage or injury. Double-check that you have everything you need before starting the work.
- Refrigerant Safety: If you’re not familiar with refrigerants, it’s best to contact professionals. Our team ensures safe handling and disposal, keeping in line with environmental regulations.
- Secure Connections: Ensure that all electrical and mechanical connections are secure. Loose connections can cause malfunctioning or damage to the system.
- Follow Instructions: Adhere to the manufacturer’s guidelines and instructions closely. Deviating from specified procedures can result in system failures or safety hazards.
Removing the Old AC Evaporator Coil
Before beginning, make sure all power to the AC unit is off. Safety is your top priority.
- Remove the AC unit’s access panel. This allows you to reach the evaporator coil safely. Keep track of all screws and fasteners; you will need them for reassembly.
- Next, identify the refrigerant lines connected to the coil. Carefully release any remaining refrigerant. Follow proper procedures or hire a certified professional to handle this step.
- Disconnect the refrigerant lines using a wrench. Be careful not to bend or damage the lines as you work. Label or note their original positions for reconnection later.
- Unscrew the brackets or fasteners holding the coil in place. Store these parts in a safe spot for reuse. Lift the coil out of the unit, taking care not to damage surrounding components.
- Check for any debris or dust inside the unit and clean it if necessary. This prevents issues when installing the new coil.
- Take a moment to inspect other components. Look for any signs of wear or damage around the unit that might need attention.
Selecting the Correct Replacement Coil
Choosing the right evaporator coil is crucial for your AC system’s efficiency. To ensure compatibility, start by identifying your AC unit’s model number and specifications, usually found on its label or manual.
Important Factors to Consider:
- Size and Dimensions: Measure the existing coil. Accurate dimensions are necessary to ensure the new coil fits properly and functions well.
- Material: Coils are typically made from copper or aluminum. Copper is durable and offers better heat transfer, while aluminum is lighter and often less expensive.
- Compatibility: Check if the coil is compatible with your current refrigerant type, whether R-22 or R-410A. Using the wrong type can impair AC performance.
- Efficiency Rating: Look for coils with a high Seasonal Energy Efficiency Ratio (SEER). A higher rating means better energy efficiency and cost savings over time.
Tips for Making the Best Choice:
- Consult Professionals: While doing it yourself can be tempting, consulting experts like Excel Mechanical can ensure you make an informed choice. Our team is dedicated to providing top-quality service tailored to your needs and budget.
- Consider Your Needs: Consider factors like climate, budget, and energy usage. Customized solutions from our team ensure the best fit for both residential and commercial applications.
Considering these aspects, you can select a coil that enhances your AC system’s performance.
Installing the New AC Evaporator Coil
First, turn off the air conditioning system. This ensures safety while you work. Then, remove the access panel to the evaporator coil. Ensure all connections, including refrigerant lines and electrical links, are accessible.
Steps for Installation:
- Clean the Area: Wipe away dust and debris. A clean space helps secure a proper fit.
- Position the Coil: Place the new evaporator coil into the slot. Ensure it’s aligned with the connectors.
- Secure Connections: Attach the refrigerant lines without bending them. Tighten screws and check that the electrical connections are solid.
- Install the Access Panel: Once everything is connected, put the panel back on securely.
It’s essential to confirm there are no leaks in the refrigerant lines. If you detect any issues, it’s wise to seek professional help. We provide expert AC installations with attention to detail. Our team ensures each HVAC system works efficiently and meets your needs.
Finally, when you start your AC, check for any unusual noises or performance issues. A smooth start indicates a successful installation.
Recharging the AC System
Recharging your AC system is essential for keeping it running efficiently.
- First, make sure the system is off and cooled down.
- Then, locate the low-pressure service port, which usually has a black or blue cap. Remember to wear safety goggles and gloves during this task.
- Next, connect the refrigerant canister to the hose, then attach the hose to the low-pressure port.
- Keep the canister upright and slowly open the valve. This allows the refrigerant to flow into the system.
- Monitor the pressure levels using a gauge to ensure they’re within the manufacturer-recommended limits.
- It’s crucial to prevent overcharging the system, as this can cause damage. If you’re not confident in doing this yourself, reaching out to professionals is a smart move.
- When the system is charged, seal the port with its cap and turn on the AC to check the cooling performance.
If everything runs smoothly, you’ve done a great job. However, if there are issues, it might be time to contact our team, as we’re known for exceptional quality in HVAC and plumbing service.
Testing the AC System Post-Installation
After installing the evaporator coil, it’s essential to test the AC system to ensure it’s working correctly.
- Check Airflow: Open all vents and feel the air coming out. It should be strong and consistent across different rooms. If you notice weak airflow, the ductwork might need inspection.
- Temperature Measurement: Use a thermometer to check the temperature of the air coming out of the vents. There should be a noticeable difference between the inlet and outlet temperatures, usually between 15-20°F.
- Listen for Noises: Turn on the unit and listen carefully. Unusual noises, such as rattling or banging, can indicate installation issues or loose components.
- Monitor System Pressure: Check the refrigerant pressure using designated gauges. For optimal performance, the pressure should align with the manufacturer’s specifications.
- Inspect for Leaks: Look around the unit and connections for any signs of refrigerant leaks. If you suspect a leak, it’s crucial to address it immediately to prevent damage.
- Confirm Thermostat Operation: Ensure the thermostat communicates correctly with the system. Test different settings to see if the AC responds appropriately.
Maintenance Tips to Prolong Evaporator Coil Life
Regular maintenance of your AC’s evaporator coil is crucial. Following these simple tips, you can keep your system running efficiently and extend its lifespan.
- Clean Filters Regularly: Dirty filters can block airflow, straining the evaporator coil. Check, clean, or replace your filters every month.
- Keep the Area Clean: Dust and debris around the coil can cause issues. Try to keep the area surrounding your AC unit clean and clutter-free.
- Schedule Professional Inspections: A professional inspection can catch small problems early. Contact Excel Mechanical for expert services tailored to your needs.
- Monitor Refrigerant Levels: Low refrigerant levels can harm the coil. Ensure the right amount by having a professional check your refrigerant yearly.
- Ensure Proper Drainage: Make sure the condensate drain is clear. This prevents water buildup, which can damage the coil.
- Avoid DIY Repairs: Leave complex work to professionals. We provide high-quality HVAC services to fit your budget and ensure your system works perfectly.
- Check for Leaks: Inspect connections and fittings for any leaks or corrosion. If you notice issues, get them fixed quickly to avoid further damage.
Frequently Asked Questions
Replacing an AC evaporator coil involves understanding costs, time, and whether you should replace just the coil or the whole unit. Here are answers to common questions on this topic.
Can I replace an evaporator coil myself?
Replacing an evaporator coil involves working with refrigerants and electrical components. For safety and efficiency, it’s best to have a qualified HVAC technician handle the task. Hiring professionals like our team ensures high-quality service and compliance with safety standards.
How much does it cost to replace an AC evaporator coil?
The cost of replacing an evaporator coil can vary widely. Factors affecting the price include the coil’s size, brand, and the complexity of the work involved. On average, costs range from a few hundred to over a thousand dollars.
Is it worth replacing an evaporator coil?
Whether it’s worth replacing your evaporator coil depends on several factors, such as the age and condition of your current system. If your system is over ten years old or has multiple issues, upgrading to a new, efficient system might be more economical.
How long does it take to replace an AC evaporator coil?
Replacing an evaporator coil usually takes between 3-8 hours. The exact time varies based on the specific unit and potential challenges during installation. An expert HVAC technician will usually provide a time estimate after an initial assessment.
Shall I replace the evaporator coil or the whole unit?
Deciding between replacing just the coil or the whole unit depends on the system’s age and performance. If your system is aging or inefficient, upgrading the entire unit may be more cost-effective.
How to remove an evaporator coil for cleaning?
First, clean the evaporator coil, and turn off the power to your AC unit. Then, remove the access panel to locate the coil. Use a soft brush or a vacuum to remove dirt. Always handle carefully to avoid damaging the fins, and consider hiring professionals for safe and thorough cleaning.