Water pressure in your home is something we often take for granted—until it’s too low or high, causing issues with your daily activities.
You don’t realize how crucial good water pressure is until you’re dealing with weak showers or expensive plumbing repairs.
On average, your home’s water pressure should be between 40 to 60 PSI (pounds per square inch).
But what happens if it’s outside this range?
Too low and you’ll find yourself struggling with poor water flow. Too high, and you risk damaging your pipes and appliances. So, how do you check?
Don’t worry, it’s simpler than you think!
With a water pressure gauge and a few easy steps, you can measure the pressure yourself and ensure your water system is in top shape. After all, understanding how your water pressure works can save you time, money, and frustration down the road.
And if you run into problems, don’t hesitate to call in experts like Excel Mechanical. Our team specializes in plumbing services, ensuring everything from your water pressure to your HVAC systems are running smoothly.
In this blog, you’ll learn:
- How water pressure is measured and the ideal range
- The tools needed to check your water pressure at home
- What to do if your water pressure is too high or too low
Let’s get started!
Understanding Water Pressure Basics
Have you ever turned on your faucet expecting a strong stream of water, only to be disappointed by a slow drip?
Or maybe your shower’s water pressure is so high it feels like you’re being blasted by a fire hose?
Either extreme can be a sign that something’s off with your home’s water pressure.
Water pressure is essentially the force that pushes water through your pipes and into your faucets, showers, and appliances. The ideal water pressure ensures a consistent and efficient flow of water throughout your home.
Typical Water Pressure Levels:
- Residential: 40-60 PSI
- Commercial: 60-80 PSI
These ranges are a general guideline, and your specific needs might vary.
Why should you care about your water pressure?
Because pressure that’s too high can strain your plumbing, leading to leaks, burst pipes, and increased utility bills. On the other hand, low water pressure can make simple tasks like washing dishes or taking a shower frustratingly slow.
The key is balancing both for a smoother daily routine.
Now that we know the basics, let’s dive into the tools and materials you’ll need to check your home’s water pressure.
Tools and Materials Required for Checking Water Pressure
So, you’re ready to check your home’s water pressure.
But before you jump in, let’s talk about the essential tools you’ll need for an accurate and hassle-free reading.
- Water pressure gauges are the primary tool. This device attaches to a faucet or hose bib and gives a pressure reading.
- The plumber’s tape is useful when connecting the gauge to ensure a tight seal and prevent leaks.
- For more precision, consider using an adjustable wrench to attach and remove the gauge securely.
- Buckets or containers can catch excess water when you connect or disconnect the gauge. Always have some nearby to prevent any water mess on your floor.
Once you’ve got your tools lined up, you’re ready to start testing!
Step-by-Step Guide to Checking Your Home Water Pressure
Now that you have the tools, let’s dive into the step-by-step guide for checking your home’s water pressure. Trust me, it’s easier than you think.
And it’s a good skill to have in your back pocket, especially when you need to identify any issues with your plumbing.
So, let’s break it down.
Locating Your Water Meter
Start by finding your water meter. It is often located near the street or sidewalk at the front of your home. In colder climates, it might be in a basement or a utility room to protect it from freezing temperatures.
Once you locate it, look for a metal or plastic cover. You may need a tool like a screwdriver to open it. If it’s outside, clearing away any dirt or debris can make it easier to access.
Knowing the exact location is crucial for both checking water pressure and monitoring your usage.
Using a Pressure Gauge
Next, you’ll need to attach the pressure gauge to a faucet.
We recommend using an outdoor faucet or a hose bib for best results.
Before attaching the gauge, make sure all other faucets or water appliances in your home are turned off. This ensures you get an accurate reading without any interruptions from running water elsewhere.
Once you’ve attached the pressure gauge securely to the faucet, turn it on.
Keep an eye on the gauge and allow water to flow into it. The needle on the gauge will give you an immediate reading of your home’s water pressure.
Why is this step crucial?
Well, it’s the foundation of understanding whether your water pressure is within a healthy range or if adjustments are necessary. Once you see the reading, you’ll know exactly what’s going on with your system.
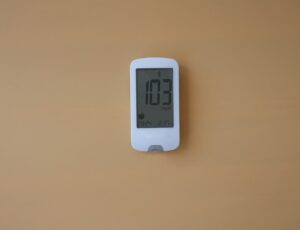
Interpreting Pressure Gauge Readings
Now for the fun part—interpreting what the gauge is telling you. Home water pressure typically falls within the range of 40 to 60 psi (pounds per square inch).
Here’s what those numbers mean:
- Below 40 psi: If the needle points to less than 40 psi, you’re likely dealing with low water pressure. This could be caused by blockages, issues with your pressure regulator, or something as simple as clogged pipes.
- Above 60 psi: If the needle points above 60 psi, that’s high water pressure, and it can cause wear and tear on your plumbing system over time. You might experience leaks, appliance damage, or unnecessarily high water bills.
- In the sweet spot (40-60 psi): If your reading falls in this range, congratulations! Your water pressure is right where it should be. No need for any adjustments.
What do you do if it’s out of range?
Don’t panic!
There are steps you can take to address both high and low pressure, and Excel Mechanical is always available to help guide you through the process. Whether you need a quick fix or a more detailed repair, we’re here to make sure your system runs smoothly.
Identifying Common Problems Related to Home Water Pressure
Water pressure problems are common, but identifying whether your issue stems from high or low pressure can make all the difference in finding the right solution.
Let’s break down the signs, potential causes, and how you can address them.
High Water Pressure Issues
High water pressure might seem beneficial at first, but it can cause significant problems over time.
Common signs include banging pipes, frequent leaks, and excessive water usage. This can result in higher water bills and potentially damage your plumbing system. Appliances may wear out faster, too.
Installing a pressure regulator can help control these issues.
Be sure to check it regularly to avoid future mishaps. If you suspect high water pressure, consider consulting with professionals.
Low Water Pressure Concerns
Low water pressure is frustrating, especially during showers or when filling a tub or pot.
Causes can be clogged pipes, closed valves, or a faulty pressure regulator. Sediment build-up also contributes to reducing efficiency and flow.
Check all faucets and valves for potential blocks.
Cleaning or replacing old parts might resolve the problem. If these steps don’t help, you might need expert assistance.
Adjusting Water Pressure in Your Home
Wondering how to fine-tune your home’s water pressure?
It’s actually pretty simple and can make a huge difference in your daily comfort.
Whether you’re dealing with high water pressure that’s causing problems or low water pressure that’s making your shower feel more like a drizzle, adjusting the water pressure is something you can tackle on your own with the right tools and a bit of know-how.
- Check Your Current Pressure: Start by using your water pressure gauge to check your home’s water pressure. Attach it to an outdoor faucet or hose bib and make sure all other water sources (faucets, appliances) are turned off. This ensures you’re getting an accurate reading. Your goal is to be within the 40 to 60 psi range, which is considered ideal for most households.
- Locate Your Pressure Regulator: Most homes have a pressure regulator located near the main water line where it enters your home. This is usually close to your water meter. The regulator is the device that controls the water pressure coming into your house.
You might need to open a metal or plastic cover to access the regulator. Depending on your home’s setup, it could be in the basement, crawlspace, or outside by your water meter. Once located, you’ll see a small adjustment screw that allows you to change the pressure. - Adjust the Regulator: Now comes the adjustment part. Use your wrench to turn the screw on the regulator. If your water pressure is too high, turn the screw counterclockwise to reduce the pressure. If your pressure is too low, turn it clockwise to increase the pressure. It’s best to make small adjustments and recheck the pressure with your gauge to avoid over-correcting.
- Recheck the Pressure: After making the adjustment, turn the water back on and check the pressure again using the gauge. You want the pressure to be in the range of 40 to 60 psi. If it’s still not right, adjust it again and keep testing until you hit the sweet spot.
When to Call a Professional
If your water pressure is consistently low or high, it might be time to call in a professional.
- Sudden changes in water pressure can signal serious issues in your plumbing system.
- Leaks or bursts in pipes often mean you need expert help. These problems can cause water damage if not fixed quickly.
- Rusty or discolored water coming from your taps might mean there’s corrosion or a problem with your pipes. Professionals have the tools to identify and solve these issues.
- If you hear strange noises, like banging or rattling when you turn on the water, there might be air in your pipes. This isn’t something most homeowners can handle alone.
If you’re dealing with complicated systems or can’t identify the problem, it’s best to seek professional guidance. Excel Mechanical offers value and reliability, so you can trust you’re in good hands.
Maintenance Tips to Prevent Future Water Pressure Problems
Once your water pressure is where it should be, there are a few things you can do to keep it in good shape:
- Check regularly: Over time, pressure can fluctuate due to wear on the regulator or blockages in the pipes. A quick check every six months ensures you’re not caught off guard.
- Clear aerators: Sediment buildup in faucet aerators can restrict water flow, making it seem like the pressure is low. Clean them regularly to maintain smooth water flow.
- Fix leaks promptly: Leaks can not only cause water pressure to drop but can also lead to increased utility bills and damage to your home. Address leaks as soon as you spot them to maintain consistent pressure.
By taking these simple steps, you can enjoy a reliable, efficient water system in your home without having to worry about inconsistent or problematic pressure.
Excel Mechanical is your best choice for HVAC and plumbing services. We offer professional solutions and customized systems to meet your specific needs and budget. Our team focuses on exceptional quality, ensuring you receive great value and reliable performance.
Regular maintenance by experts like us can save you from unexpected water pressure issues.
Frequently Asked Questions
Water pressure problems can be puzzling, and it’s not always easy to pinpoint the cause. But don’t worry! Here are answers to some of the most common questions we get about home water pressure issues. Understanding these can help you tackle problems quickly and effectively.
What is the process for inspecting the water pressure regulator at home?
Locate the water pressure regulator, which is usually found near where the main water line enters your home. Check for any signs of wear or damage. Adjust the screw on the top of the regulator using a wrench to either increase or decrease the water pressure as needed.
How can I increase or decrease the water pressure in my house?
First, find the water pressure regulator on the main water line. Use a wrench to turn the adjustment screw; clockwise to increase pressure, counterclockwise to decrease it. Making small adjustments is key to avoiding sudden changes.
What steps should I follow to perform a water pressure test in my home?
Attach a water pressure gauge to an outdoor hose bib or inside faucet. Make sure all other taps and water appliances are off. Turn on the tap with the gauge and read the pressure. Typical home water pressure should be between 40 and 60 psi.
Which water pressure gauge is recommended for home use?
Choose a gauge that is suitable for home use. Look for one with a range of 0-100 psi, which is sufficient for household applications. Ensure it has an easy-to-read dial and can attach securely to your faucet.
Can the water pressure be checked without a specialized gauge?
While not as accurate, you can estimate water pressure by filling a bucket of known volume and timing how long it takes. However, this method lacks precision and may not detect specific issues like a proper gauge would.
What are the common reasons for fluctuating water pressure in a residential setting?
Fluctuations can be caused by leaks, blockages, or faulty regulators. Changes in municipal water pressure may also affect your home. Appliances used at the same time can lead to temporarily lower pressure.